
Pear Mousse Cake: Step by Step
I’ve always wanted to make a dessert using a technique that allows you to “print” designs onto cake. My first anniversary with my current employer, Shopify, provided the perfect reason to explore this idea and the result was a Pear Mousse Cake.
The technique of biscuit Joconde imprimée involves drawing a pattern with a special batter, then embedding that design into a thin cake layer. The patterned strips of cake are used to line a cake ring, and the whole thing filled with mousse. Combining several recipes from Advanced Bread and Pastry by Michael Suas, here’s how I made the cake on Thursday, from start to finish:
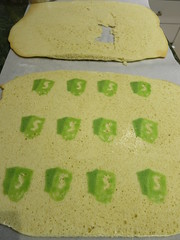
Pâte à Decor
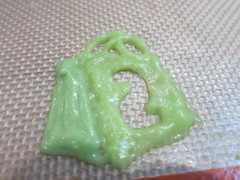
This is the coloured batter used to make the design. I had a false start on Thursday morning when I tried to be clever and use the official RGB values from the company logo and translate that into drops of food colour. This didn’t work out, as the vials of colouring didn’t correspond to pure red, green and blue, and I ended up with a horribly tinted batter that I threw away.
I had better success in the evening. After creating a template on paper printed with mirror image copies of the design, I cut out the outline, as well as the interior letter S. Using a parchment cone with a very tiny tip, I carefully traced the outline, then filled in the rest of the design freehand. The letter was more problematic, as paper is a poor template material and got progressively soggier.
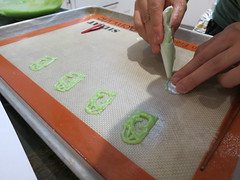
Biscuit Joconde
An almond sponge cake, biscuit Joconde is made from whipping egg yolks and egg whites separately, combined with sugar, ground almonds and flour. I spread the batter thinly across the frozen decor batter, then the remainder into another half sheet pan to use as the bottom. Some of the cake recipes I researched called for a dacquoise or other type of cake for the bottom, but re-using the leftover cake was simplest.
I might have measured one of the ingredients incorrectly, because I didn’t end up with 650g of batter, and had difficulty dividing it into two half sheet pans. Perhaps I also spread it too thickly, because it took almost 20 minutes of baking at 400°F before the sponge was set.
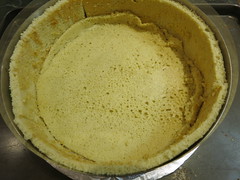
Lining the Cake Ring
 Once the baked sponge cake cooled slightly, I turned it out onto a
large parchment sheet dusted with granulated sugar, so it wouldn’t
stick.
Once the baked sponge cake cooled slightly, I turned it out onto a
large parchment sheet dusted with granulated sugar, so it wouldn’t
stick.
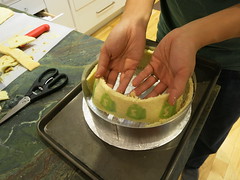
After carefully cutting the patterned areas into long strips, I tucked them into the inside of an 8.5” cake ring. The last step was to cut a circle from the other cake and place that into the bottom.
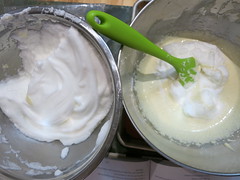
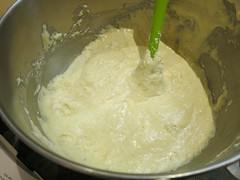
Pear Mousse
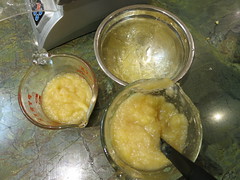
The mousse required a pear purée which I made by poaching Bosc pears in a syrup (leftover from an earlier project) then processing them in a blender. A little bit of the blended fruit was warmed to dissolve the bloomed gelatin sheets.
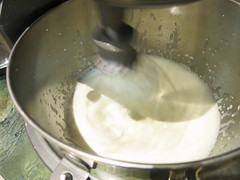
After whipping heavy cream into soft peaks, I carefully folded everything together.

Filling
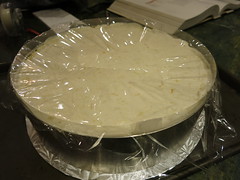
I poured the pear mousse mixture right into the lined cake ring, and smoothed out the top a bit. Normally, a fancy entremet has a second layer of cake or contrasting filling, and perhaps a glaze applied on top. For example, see this mango mousse cake. But again, I went with the simplest approach.
Finished
After chilling overnight, and a few additional hours at work, the cake was ready to serve. It unmolded easily, and sliced easily too.
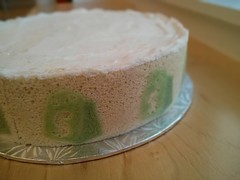
I found the flavour and texture of the pear mousse to be perfect: very flavourful and true to the fruit, and stiff enough to slice cleanly. The cake was a bit bland, but the logo on the outside made heads turn.
Leave a comment